
There are many more edible mushrooms than most people know about and than are sold in the stores. But did you know you can grow your own mushroom patch in your garden or right on your kitchen bench if you like?
In this article we will look at just a few mushrooms that you can grow at home and how to get started very cheaply.
Mushrooms Types
Throughout history, mushrooms have been used by humans as far back as Paleolithic times. Mushrooms have been used in a range of ways including as weapons of death, in spiritual rituals, as hallucinogens, and as food. The role of mushrooms in nature, on the other hand, is based on the ability of the mycelium to interact with or decompose its host.
Most gourmet mushrooms are primary decomposers, meaning they will decompose the host or substrate using enzymes and acids they secrete to change large molecular complexes into simpler compounds. As decomposers they are seperated into primary, secondary and tertiary groups.
Primary decomposers are those which will attach themselves to a twig or blade of grass or even a tree stump. They will send out rope like strands of mycelium which quickly spread to decompose the material. Some of the better known primary decomposers are Oyster Mushrooms and King Stropharia.
Secondary decomposers rely on the activity of the previous activity of other fungi to partially breakdown the substrate to a state that is conducive for them to thrive. Button Mushrooms are an example of secondary decomposers.
Tertiary decomposers are typically soil dwellers and survive in habitats that are years in the making from the activity of the two previous groups. A common example is the Orange Peel Mushroom which thrives on the waste generated by button mushroom compost.
Growing Mushrooms from Waste
Many people have tried to grow mushrooms from the waste generated by button mushroom farms. While you may be successful it is very hit and miss. You will also run the risk of eating something that is not really fit for consumption. Many farms now are required to inactivate the compost before they can sell it to garden centres etc.
Additionally, some mushrooms can be used for soil rehabilitation there by making them inedible. These mushrooms take up contamination in order to render the soil more usable. This is a process used extensively in the USA and is very effective.
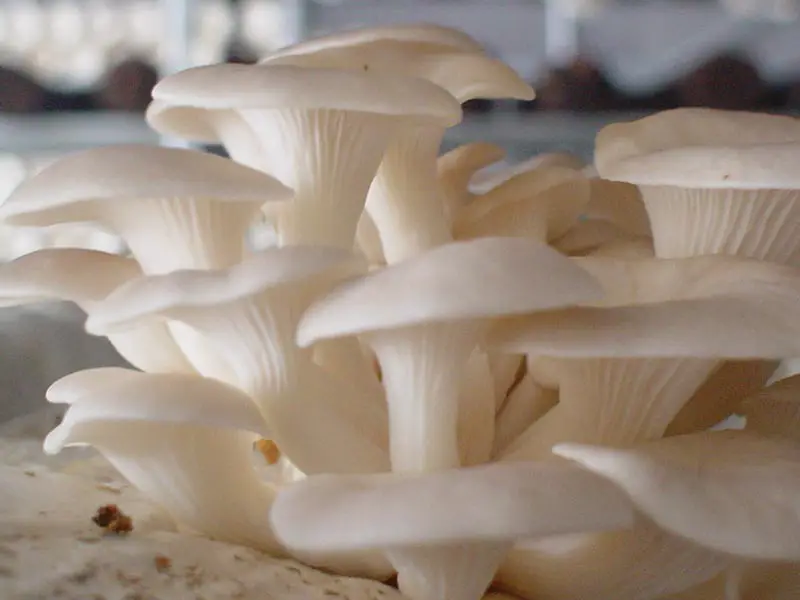
On the other hand there are a few mushrooms that can be grown from the waste produced when cooking and cleaning them. These mushrooms are commonly known as Oyster Mushrooms.
Stem Butts to Mushrooms
We have all bought those exotic looking mushrooms in the supermarket or green grocers but did you know you could grow them yourself?
While there are many videos and articles on the internet showing you how to do this with a few pieces of cardboard we have found that the best way is to use kitty litter. Yes really!
Not just any kitty litter will do mind you. It must be 100% recycled paper kitty litter and is sold quite cheaply in your local Walmart or Woolworths. There is no need to worry about which brand to get as long as it is 100% paper pellet. Once you have your mushroom stems and your kitty litter you are good to go.
To get started all you need now is small bowl, a knife, some paper tape(micropore by 3M is good), a plastic zip lock bag, a set of kitchen scales, dishwashing detergent and some water.
Start by making sure all your items including your hands and work surfaces are very clean and dry. Decomination is the biggest reason the mushrooms won’t grow.
Next – Mix your paper pellets with cold water (adding a few drops of dishwashing liquid to the water first) at a ratio of 40% paper pellets and
60%water by weight. For example: if you want to create a kilo of fruiting substrate you will require 80g of paper pellets and 120ml of water.
Once the water has been absorbed, the substrate is ready for use.
Cut up your mushroom stems and add the material to the bowl you mixed the paper pellets in, then scoop the entire mixture into your zip lock bag and seal it. This will become our starter culture and will be the basis for our fruiting bag later on.
Make some small holes in the bag to allow for oxygen exchange and cover them with small pieces of paper tape. This will keep any nasty’s out while your mycelium grows.
It should take around 2-3 weeks for the entire bag of pellets to turn white with mycelium. Don’t worry if you get a little bit of yellow liquid in there it won’t hurt anything.
When your bag has turned white and is fully colonised we are ready to move onto the fruiting bag.
It is exactly the same process as before just bigger quantities. This time you will need 800grams of paper pellet and 1.2litres of water. You will need a bigger bag or you can use a clean bucket with a lid that you have predrilled some holes around the outside with a 10ml drill bit.
Break up your mycelium and add it to the paper pellet and water mix. Mix it well and bag it up and seal as before. The mushrooms will use the holes you made in the bag and covered with paper tape to fruit out of.
Again you will need to wait 2-3 weeks for the bag to become fully colonised and then you will start spraying it with water twice a day to start the fruiting process. Don’t let them dry out.
Once they reach a reasonable size start harvesting your mushrooms – if left to continue growing they will start to drop spores and will not be as tasty.

Once you have eaten all your mushrooms don’t throw the substrate away simply soak it overnight in a bucket of clean water and then start spraying daily again. You will get two to three more runs of mushrooms before you need to start over.
There is nothing like fresh homegrown mushrooms fried with garlic and butter on toast.
If you would like to learn more about growing mushrooms or would like to share your success please email us here.